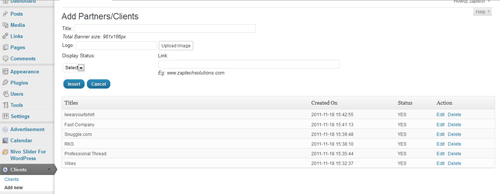
Hey Guys, After a long time i came back with a new and good info. In my project i want to upload a image in the admin side plugin. I’m searched a more than 3 hours and got a nice and life saver tutorial. So i thought to save others save so i’m sharing the code and method.
Firstly add the HTML form as like
<tr valign=”top”>
<th scope=”row”>Upload Image</th>
<td><label for=”upload_image”>
<input id=”upload_image” type=”text” size=”36″ name=”upload_image” value=”” />
<input id=”upload_image_button” type=”button” value=”Upload Image” />
<br />Enter an URL or upload an image for the banner.
</label></td>
</tr>
Now time to create the “my-script.js” and paste it inside your plugin folder
jQuery(document).ready(function() {
jQuery(‘#upload_image_button’).click(function() {
formfield = jQuery(‘#upload_image’).attr(‘name’);
tb_show(”, ‘media-upload.php?type=image&TB_iframe=true’);
return false;
});
window.send_to_editor = function(html) {
imgurl = jQuery(‘img’,html).attr(‘src’);
jQuery(‘#upload_image’).val(imgurl);
tb_remove();
}
});
The first click() event listener opens a ThickBox dialog when the “Upload Image” button is clicked, and loads the uploader page inside it. It also stores the name of the URL input field in a variable, for later use.
The second function overrides the send_to_editor() function in the media-upload script. This is probably the most important part. When the “Insert into Post” button is clicked in the uploader dialog, this function fires. It collects the URL of the image that was uploaded, dumps it into the awaiting form field, and closes the ThickBox dialog.
Now, you need to enqueue some scripts and styles. Its already predefined int he wordpress
function my_admin_scripts() {
wp_enqueue_script(‘media-upload’);
wp_enqueue_script(‘thickbox’);
wp_register_script(‘my-upload’, WP_PLUGIN_URL.’/my-script.js’, array(‘jquery’,’media-upload’,’thickbox’));
wp_enqueue_script(‘my-upload’);
}
function my_admin_styles() {
wp_enqueue_style(‘thickbox’);
}
if (isset($_GET[‘page’]) && $_GET[‘page’] == ‘my_plugin_page’) {
add_action(‘admin_print_scripts’, ‘my_admin_scripts’);
add_action(‘admin_print_styles’, ‘my_admin_styles’);
}
We need the media-upload and thickbox scripts for starters, as well as jQuery, which is already included. Then we have to register and enqueue our own JavaScript file, my-script.js, which will handle the media uploader functionality. We also need to load the thickbox stylesheet in the next function.
The if (…) block ensures that the scripts and styles will only be included if the user is on a specific admin page. If you look at your plugin’s (or theme’s) admin page, the URL should have a ?page=some_string at the end. Substitute my_plugin_page for that string.
That’s it. Providing everything went according to planned, you should have a form field that will either accept an arbitrary image URL, or allow a user to upload one on the spot.

